

Hey there, my fellow Mammas! Welcome back to my blog! In today’s addition, I’m thrilled to share my DIY instructions for the Homeschool Wheel of Fun. For those of you who’ve been following my blog, you might remember reading about this marvelous creation in my blog post: “Adding a New Hat to the Collection: Balancing Work and Homeschooling.” But if you’re new here and haven’t had the chance to dive into my previous post, no worries, I’ve got you covered!
Picture this: The Wheel of Fun is like the spinning wheel you’d see at a carnival, but instead of winning fluffy stuffed animals or cotton candy, it’s filled with various subjects that can inspire daily, fun activities to spice up your kids’ homeschool education. Each week, the kids take turns spinning the Wheel of Fun, and it lands on a subject that sparks a daily lesson plan. It’s a means for this mom to maintain a strong connection with her kids and support their young minds after a day at the office. And guess what? You can find a free weekly planning sheet in the Playbook section of my blog, so you can track the subjects spun and jot down some helpful notes. How’s that for a clever homeschooling hack? Sounds intriguing, right? Let’s dive into the DIY business!
Supplies:
- Cardboard
- Paper Towel Roll
- Tulle Fabric Spool
- Wood Dowel
- Ruler
- Drawing Compass
- Paint
- Glue Gun
- Scissors
- Pencil
Now that we’ve got all our supplies ready, it’s time to get started!
Step 1: Cutting Out the Shapes
First things first, let’s wield those scissors and cut out some cardboard shapes. You’ll need a large circle for the Spinning Wheel, two small circle pieces to support the front and back of the wheel, a large rectangle for the base, a small rectangle to fit atop your paper towel roll, and a small triangle piece that will attach to your small rectangle to create the subject selector.
Step 2: Building the Wheel
With our shapes ready, let’s start building! Begin by joining the two tubes together. The Tulle spool is your trusty support for the wheel, and it needs to be hot glued to the center of your base. To connect the two tubes, slip the paper towel roll on top of the Tulle roll. Decide how tall you want your project to be, then securely glue the tubes together at the base of the paper towel roll. Next, grab that small rectangle piece and center it atop your paper towel roll. You want the rectangle to overhang enough so that when you attach the small triangle piece, there’s still room for the wheel to spin freely. Speaking of which, it’s time to attach that triangle piece to the overhang on the small rectangle. Now, grab your large circle, find the center, and create a hole big enough for the dowel to pass through. Add the small circle on top of the dowel in the front. Attaching the wheel to the paper towel rolls can be a bit like playing Wheel of Fortune – it might take a few tries until you find the sweet spot. Create a hole in the front of the paper towel that goes through the back, ensuring that your spinning wheel has ample room to spin without catching on the top. Once the holes are ready, slide the dowel through your spinner. Afterward, you can trim the dowel down and place a hole in the center of the second circle, positioning it on the backside of the dowel.
Step 3: Get Creative with Sections
Now, it might feel like backtracking, but I took out the wheel and decided to create the sections. This is where your creativity can run wild! I went for 12 sections, but feel free to customize your wheel to your family’s needs.
Step 4: Time for a Splash of Color
Here’s my favorite part – adding some vibrant colors to this masterpiece we’ve crafted. I chose a different color for each section, but you can let your imagination and creativity run wild here. Grab your colors and get painting, Momma!
Step 5: Fill Those Sections
Now comes the exciting part – filling your spinning wheel sections with content. I chose 12 different subject categories for our homeschool curriculum. But, hey, it’s your turn to make the Wheel of Fun uniquely yours, customized to your family’s needs. Once your paint has dried, reassemble your wheel, and voila, you did it!
Give It a Spin and Be Proud
Give that Wheel a spin and bask in your DIY glory! Together, we’ve cooked up a fun and engaging activity for our kids. You go, Mama!
Step 6: The Grand Finale
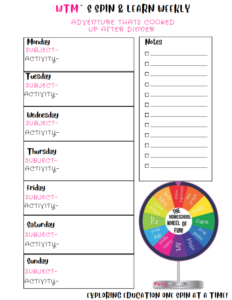
Finally, it’s time to head over to the “Playbook” section of Who’s the Mom.com and grab your free download of the “Spin & Learn Weekly Adventure – The Fun That Is Cooked Up After Dinner!” This download is the perfect addition to our masterpiece.
So there you have it, my fellow crafty Mammas – the Homeschool Wheel of Fun, your secret weapon to keeping the learning experience fun and engaging after dinner. Now, go tackle those educational adventures with a spin, a grin, and a whole lot of Mom charm!
Happy Spinning!
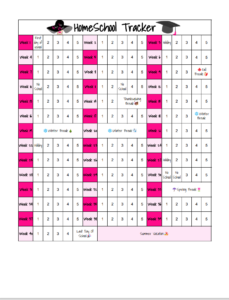
Check Out the Free Printable Schedule Here